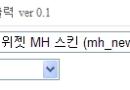
최근문서출력위젯에 있는 전광판스킨을 변형해 보겠습니다.
1. /zbxe/widgets/newest_document/skins/news_ticker/list.html를 편집기로 열어서
<span class="sum"> <font color="#ff6600">/</font> {$oDocument->getSummary()}</span>는 본문의 내용이 나옵니다.
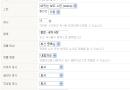
<!--@if($widget_info->display_regdate == 'Y')--> 녹색부분들이 선택유무 지정 소스입니다.
2. /zbxe/widgets/newest_document/skins/news_ticker/css 안에 해당 컬러의 css를 편집기로 여시면(예; black.css)
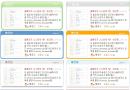
[변경전]
[변경후]
참고로 height:25px가 한줄의 높이입니다. 5줄이라 125px했으니 줄수에 맞추어서 높이 정하시면 됩니다.
그리고 repeat-x를 repeat으로 변경하면 배경이미지가 줄마다 나옵니다.(이게 글이 스크롤되니 보기가 어렵습니다.)
만약 위에 한칸만 나오게 할려면 repeat-x를 그대로 두시고 background:#FFFFFF를 검정색으로 바꿔주시면 됩니다. background:#000000
그것도 아니고 전부를 이미지가 안 나오게 할려면 스킨을 내용만출력으로 선택하시면 됩니다.
.news_ticker_black ul li .author { color:#FFFF00; font:.8em seevaa9;}
이부분이 닉네임의 글꼴,칼라,크기등을 지정합니다.(seevaa9는 웹폰트입니다)
.news_ticker_black ul li .sum { color:#C0C0C0; font:.9em Tahoma; white-space:nowrap;}
이 부분이 본문내용의 글꼴,칼라,크기등을 지정합니다.

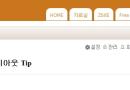
적용된 것 보기
[문제점]
한페이지에 2개의 전광판은 스크롤이 되지를 않는군요.
1. /zbxe/widgets/newest_document/skins/news_ticker/list.html를 편집기로 열어서
<div class="tickerBox" id="{$_news_ticker_id}">
<ul>
<!--@foreach($widget_info->document_list as $oDocument)-->
<li>
<!--@if($widget_info->display_regdate == 'Y')-->
<span class="date">{$oDocument->getRegdate("m-d")}</span>
<!--@end-->
<span class="title">
<a href="{$oDocument->getPermanentUrl()}#{$oDocument->getCommentCount()}">{$oDocument->getTitle($widget_info->subject_cut_size)}</a>
<!--@if($oDocument->getCommentCount())-->
<span class="comment">[<a href="{$oDocument->getPermanentUrl()}#comment"><strong>{$oDocument->getCommentCount()}</strong></a>]</span>
<!--@end-->
{$oDocument->printExtraImages($widget_info->duration_new)}
</span>
<!--@if($widget_info->display_author == 'Y')-->
<span class="author">by {$oDocument->getNickName()}</span>
<!--@end-->
<span class="sum"> <font color="#ff6600">/</font> {$oDocument->getSummary()}</span>
</li>
<!--@end-->
</ul>
</div>
<span class="author">by {$oDocument->getNickName()}</span>는 작성자 닉네임,<ul>
<!--@foreach($widget_info->document_list as $oDocument)-->
<li>
<!--@if($widget_info->display_regdate == 'Y')-->
<span class="date">{$oDocument->getRegdate("m-d")}</span>
<!--@end-->
<span class="title">
<a href="{$oDocument->getPermanentUrl()}#{$oDocument->getCommentCount()}">{$oDocument->getTitle($widget_info->subject_cut_size)}</a>
<!--@if($oDocument->getCommentCount())-->
<span class="comment">[<a href="{$oDocument->getPermanentUrl()}#comment"><strong>{$oDocument->getCommentCount()}</strong></a>]</span>
<!--@end-->
{$oDocument->printExtraImages($widget_info->duration_new)}
</span>
<!--@if($widget_info->display_author == 'Y')-->
<span class="author">by {$oDocument->getNickName()}</span>
<!--@end-->
<span class="sum"> <font color="#ff6600">/</font> {$oDocument->getSummary()}</span>
</li>
<!--@end-->
</ul>
</div>
<span class="sum"> <font color="#ff6600">/</font> {$oDocument->getSummary()}</span>는 본문의 내용이 나옵니다.
<!--@if($widget_info->display_regdate == 'Y')--> 녹색부분들이 선택유무 지정 소스입니다.
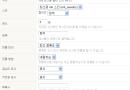
2. /zbxe/widgets/newest_document/skins/news_ticker/css 안에 해당 컬러의 css를 편집기로 여시면(예; black.css)
[변경전]
.news_ticker_black { height:25px; overflow:hidden; clear:both; background:#FFFFFF url("../images/black/bg.gif") repeat-x left top; white-space:nowrap; }
.news_ticker_black table { width:100%; height:25px; margin:0; padding:0; table-layout:fixed; border-left:1px solid #000000; border-right:1px solid #000000; }
.news_ticker_black table td { white-space:nowrap; overflow:hidden; height:25px; vertical-align:top; padding:0 6px 0 6px;}
.news_ticker_black .tickerBox { height:25px; padding-top:6px; white-space:nowrap; overflow:hidden; }
[변경후]
.news_ticker_black { height:125px; overflow:hidden; clear:both; background:#000000 url("../images/black/bg.gif") repeat-x left top; white-space:nowrap; }
.news_ticker_black table { width:100%; height:25px; margin:0; padding:0; table-layout:fixed; border-left:1px solid #000000; border-right:1px solid #000000; }
.news_ticker_black table td { white-space:nowrap; overflow:hidden; height:25px; vertical-align:top; padding:0 6px 0 6px;}
.news_ticker_black .tickerBox { height:125px; padding-top:6px; white-space:nowrap; overflow:hidden; }
.news_ticker_black ul li .author { color:#FFFF00; font:.8em seevaa9;}
.news_ticker_black ul li .sum { color:#C0C0C0; font:.9em Tahoma; white-space:nowrap;}
참고로 height:25px가 한줄의 높이입니다. 5줄이라 125px했으니 줄수에 맞추어서 높이 정하시면 됩니다.
그리고 repeat-x를 repeat으로 변경하면 배경이미지가 줄마다 나옵니다.(이게 글이 스크롤되니 보기가 어렵습니다.)
만약 위에 한칸만 나오게 할려면 repeat-x를 그대로 두시고 background:#FFFFFF를 검정색으로 바꿔주시면 됩니다. background:#000000
그것도 아니고 전부를 이미지가 안 나오게 할려면 스킨을 내용만출력으로 선택하시면 됩니다.
.news_ticker_black ul li .author { color:#FFFF00; font:.8em seevaa9;}
이부분이 닉네임의 글꼴,칼라,크기등을 지정합니다.(seevaa9는 웹폰트입니다)
.news_ticker_black ul li .sum { color:#C0C0C0; font:.9em Tahoma; white-space:nowrap;}
이 부분이 본문내용의 글꼴,칼라,크기등을 지정합니다.
적용된 것 보기
[문제점]
한페이지에 2개의 전광판은 스크롤이 되지를 않는군요.


멋집니다 그런데
한줄 전광판 에서
정사각형 박스형 전광판으로 바꿀수는 없는지좀 알려주세요